

Occasionally, you may need help installing Windows Updates on your system. For example, if you ever see a warning stating that update files are missing or cannot be installed, the error code 0x80073712 may also be shown. As noted, it is caused by errors in the updated files. Simply deleting the downloaded update components will fix the issue. This enables your system to download them, but this time without any errors. In more severe circumstances, an in-place repair may be required to perform all system file errors. In this post, we discuss the causes of error code 0x80073712 and the most effective solutions.
Error Code 0x80073712 Causes
Here are some of the potential reasons for error code 0x80073712:
1 – Corrupted Windows Update temporary files.
2 – System files are missing or corrupted.
3 – Power failure during the update installation.
4 – Infection with malware.
Error Code 0x80073712 Solutions
There are several potential solutions for this error code 0x80073712. Please try the following fixes. Ensure that you have a backup of any important data on an external disc before attempting the following solutions. You may back up your files using online storage services such as Google Drive, OneDrive, etc. Before beginning, restart or shut down and switch on your computer.
Windows Update Troubleshooter
It is feasible to fix most Windows Update errors with its Troubleshooter. Use this tool before attempting any sophisticated solutions. The steps to launching this Troubleshooter are as follows:
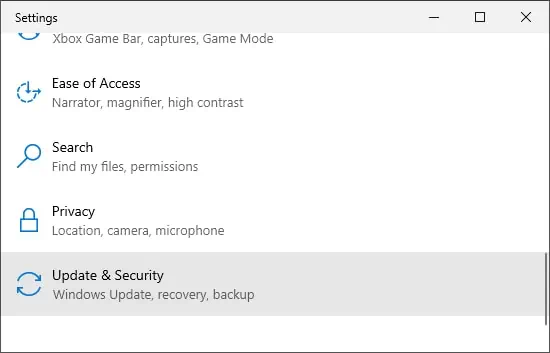
1 – Select Settings (Windows key + I) and navigate to Update & Security > Troubleshooter.
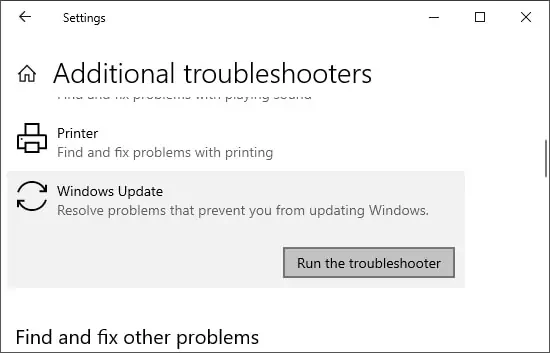
2 – Then, select Windows Update Troubleshooter or Additional troubleshooters > Windows Update.
3 – Choose the Run the troubleshooter option.
Restart your computer and verify that the Troubleshooter has resolved the issue.
If not, proceed to the next solution.
Note: If the Windows 10 built-in Troubleshooter cannot fix this issue, you may also download and launch the Windows Update Troubleshooter.
Repair System File Corruption
The corruption of crucial system files might cause this update error. Scan and repair faulty files with System File Checker (SFC) and Deployment Image Servicing and Management (DISM). Follow the instructions below to use the elevated Command Prompt to access these features:
1 – Type Command Prompt into the search bar.
2 – Using the right-click menu, select Run as administrator.
3 – Type the commands listed below and press Enter to execute them.
dism /online /cleanup-image /scanhealthdism /online /cleanup-image /restorehealthsfc /scannow
4 – Restart your computer if an error is detected and repaired. Then, check if the issue persists.
If the SFC detects corrupt files but cannot repair them, you may need to replace them manually.
Delete Pending.xml File
If an update requires additional activities after a reboot, your system produces the Pending.xml file. After a system restart, this file is examined, and any necessary actions are executed. Due to this file, the update installation cannot be completed due to error code 0x80073712. You can delete this file to force Windows to generate a new update.
Note: The pending.xml file is not required for all updates. In such instances, the system cannot find the file. Therefore, move to alternate methods if the file does not exist.
Before you may remove or rename this file, you must assume ownership of it. In certain instances, however, you cannot delete the pending.xml file even after assuming ownership. Therefore, applying this method in safe mode is preferable to circumvent this issue. The steps to delete the pending.xml file are as follows:
1 – Navigate to Start > Power.
2 – Click the Restart button while holding the Shift key. It directs you to the Windows Recovery Environment.
3 – Navigate to Troubleshoot > Advanced options > Startup Settings > Restart.
4 – Press 4 or F4 to start the system in safe mode.
5 – Open the elevated Command Prompt after starting.
6 – Copy the commands below and press Enter after each to execute them:
net stop trustedinstallercd %windir%\winsxstakeown /f pending.xml /acacls pending.xml /e /g everyone:fdel pending.xml
Restart your computer and attempt updating the OS again.
Reset Windows Update Components
Resetting the update components can fix the vast majority of Windows Update errors. During this method, you will typically perform the following tasks:
1 – Resetting Windows Update-required services.
2 – Deleting previously downloaded update files.
3 – Restoring additional cached update files
Follow the below instructions to execute these processes:
1 – Click the Wi-Fi icon in the notification area and tap Airplane Mode.
2 – Open the elevated Command Prompt, then.
3 – Type the commands listed below and hit Enter after each:
net stop bitsnet stop msiservernet stop appidsvcnet stop wuauservnet stop cryptsvcdel "%ALLUSERSPROFILE%\Application Data\Microsoft\Network\Downloader\qmgr*.dat"ren C:\Windows\SoftwareDistribution SoftwareDistribution.oldren C:\Windows\System32\catroot2 catroot2.oldnet start cryptsvcnet start wuauservnet start appidsvcnet start msiservernet start bitsnetsh winsock reset
Malware Scan
Some malware threats can infect updated files or the tools used to install them. It is important to set real-time protection on your antivirus software to prevent such situations. Scan your computer for threats if this error code 0x80073712 appears. In addition, we recommend setting cloud-based protection on your antivirus apps. Follow the instructions below to scan your computer with Virus & Threat Protection.
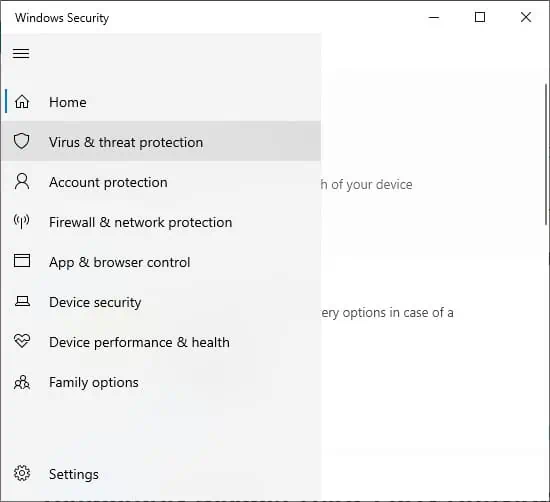
1 – Click the Windows Security icon (the Shield icon) on the system tray.
2 – Choose Virus & threat protection by clicking Options (three lines) and then Virus & threat protection.
3 – Click Scan options inside Current threats.
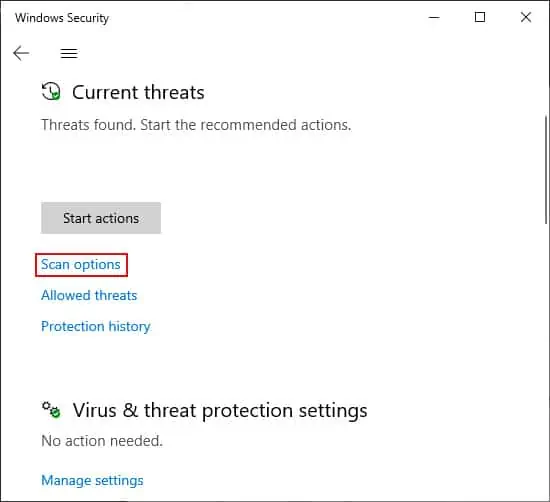
4 – Check the box next to Full Scan and choose Scan now.
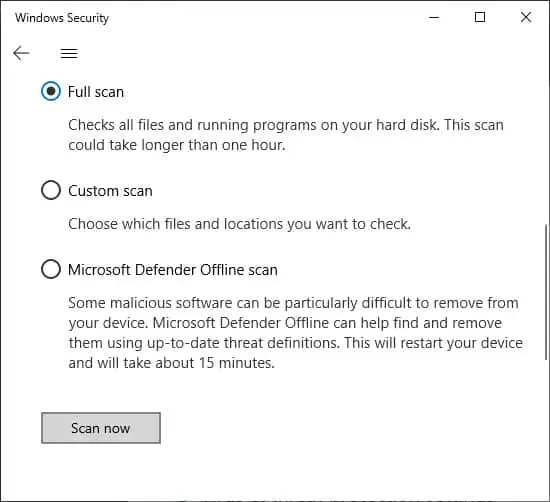
5 – Scanning might take some time. Please be patient while it completes.
Temporarily Disable Third-Party Security Software
Before retrying the update, it is also possible to temporarily disable any third-party antivirus or firewall solution. In addition, some security software may create similar errors during update installation if it incorrectly identifies the updates as system threats. We recommend installing antivirus software compatible with Windows to prevent this issue. The website of the software maker should provide information on compatibility difficulties.
In-place Repair Upgrade
A repair-in-place reinstalls Windows over your existing installation without impacting your app and user files. This will repair your system corruption and remove any installed updates. You can use an ISO file or USB installation medium for this procedure. We recommend using the ISO file instead of the latter option. The installation software must have the same build as your current system version for the repair to be successful. Make certain the installation media’s base language matches your system’s configuration.
1 – Download the ISO file, mount it, or insert a bootable USB drive.
2 – Launch setup.exe from the installation media.
3 – Click Modify how Windows setup downloads updates.
4 – Check Not at this time and click Next. You can download updates and optional features once the error has been resolved.
5 – Click Accept to accept the conditions.
6 – Click the Install button once everything is ready. There is also an option to modify what you wish to find.
After completing the repair, log in to your account and perform Windows Update.
Perform System Restore
If the above methods are unsuccessful, you can restore your system to a previously generated restore point. Well, you can only perform a system restore if it has been enabled and a restore point has been created. Here are the steps to perform a system restore:
1 – Enter systempropertiesprotection in the Run dialogue box. It will lead you to the System Properties’ System Protection tab.
2 – Click the System Restore button.
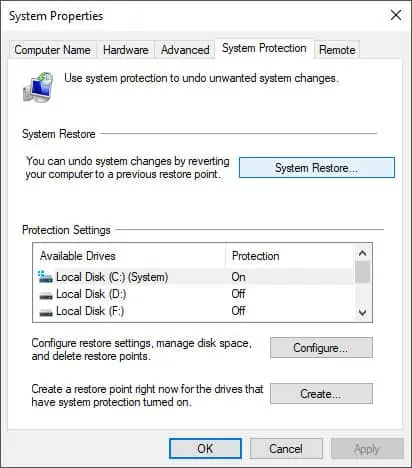
3 – Follow the on-screen instructions after selecting a suitable restore point.
4 – You will also have the option to check for impacted programs. Please click the option to find which programs require reinstallation.
Reset PC
This is the final option if all other methods fail and you do not have a suitable restore point. It will restore your computer to its factory settings and remove any system errors. To perform a system reset, please follow the instructions below:
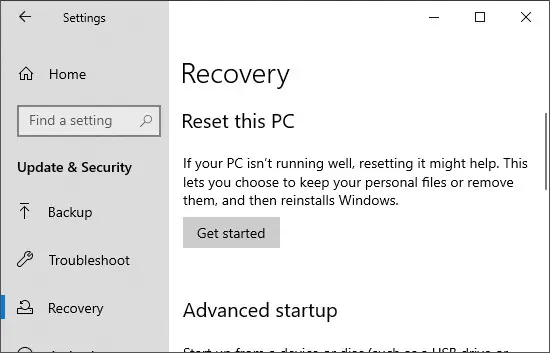
1 – Open Settings and click Update and Security.
2 – Choose Recovery.
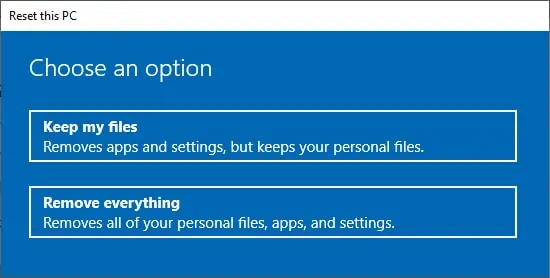
3 – Under Reset this PC, click the Get started button.
4 – Select When asked, select Keep my files and click OK.
5 – Comply with the on-screen directions.


